
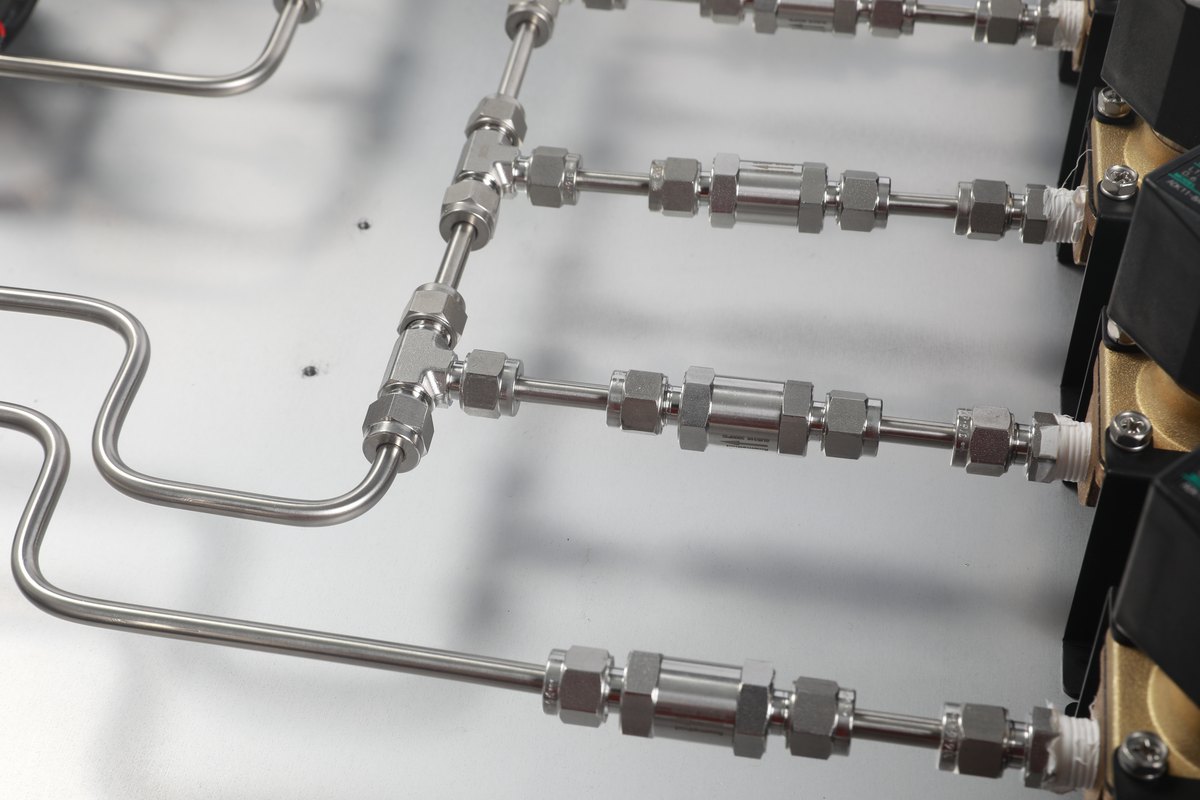
A small leak at a fitting can make the flow delivered to the process differ from the instrument's reading, affect a gas mixture and reduce repeatability. The display alone may not reveal the problem. Check for leaks after installing a system, disturbing fittings, or returning equipment to service after a long shutdown.
Two checks before testing
- Use a suitable inert test gas, such as dry nitrogen or argon, with an approved discharge arrangement. Use the agreed test pressure within the ratings of every component. Do not use a flammable process gas to look for leaks, and do not use a hand to judge whether gas is escaping.
- Inspect first. Look for loose fittings, damaged threads, scratches, contamination or signs of incomplete assembly. Correct visible defects only after isolating and depressurizing the system.
Method 1. Leak-detection fluid: locate a surface leak
Apply a compatible, non-corrosive leak-detection fluid to accessible fitting and valve connections. Continuing bubble growth indicates leakage. Bubble size and growth speed can help locate a leak but are not a calibrated leak-rate measurement.
For double-ferrule fittings, examine the nut-to-body area and the tube-to-ferrule connection. Remove the fluid residue after testing and prevent it from entering the gas path. Use only fluid compatible with the materials and the cleanliness requirements of the system.
Method 2. Pressure-hold testing: assess the isolated system
Close the downstream isolation point, pressurize with the approved inert gas, allow pressure and temperature to stabilize, then isolate the supply. Record the pressure again after the agreed interval—for example, 30 minutes to several hours, depending on system volume and the test procedure.
Pressure loss can indicate an external leak, internal leakage across an isolation device, or temperature changes. A small pressure change is useful evidence but does not by itself prove compliance with a specified leak rate. Acceptance limits depend on volume, pressure, temperature, instrument resolution and the required leak specification; use the relevant manual or an engineer-approved procedure.
Method 3. Section-by-section isolation: narrow the location
In a system with many fittings and instruments, isolate sections using suitable shutoff points. Test each section separately to identify where pressure is lost, then use leak-detection fluid on its accessible connections.
An instrument can also be tested separately with a suitable pressure-rated test fixture to distinguish a piping leak from a leak in the instrument. Compare the result with the manufacturer's test method, units and acceptance limit stated in the inspection report. If internal sealing may be damaged, contact the manufacturer rather than forcing a field repair.
Frequently overlooked points
- Never tighten or dismantle a pressurized fitting: isolate and depressurize first.
- Do not put thread-sealing tape or sealant on the ferrule sealing surfaces. Tapered pipe-thread connections are a different connection type and must follow their own instructions.
- Reassembly instructions differ from first installation. Follow the actual fitting manufacturer's procedure; extra turns are not a universal remedy for leakage.
- Repeat the check after relevant installation changes, replacement of components, transport, or restart after a long shutdown.
Combine surface inspection, a controlled pressure-hold test and section isolation to locate the problem. If the result remains unclear, provide the recorded pressures and conditions to the engineer before dismantling the instrument.
For selection, installation or technical enquiries, contact Flowmethod: Mr. Dou, +86 180 3818 3381; doufeijin@hotmail.com. See Contact for the full contact list.